LMS Milk Tank - 2

Discuss freight and rolling stock here
Keith1500
Fat Controller
Posts: 150
Joined: Tue Jul 04, 2006 8:27 pm
Location: B/Hill, Essex

Re: LMS Milk Tank - 2

Post by Keith1500 » Sun Dec 05, 2010 7:50 pm

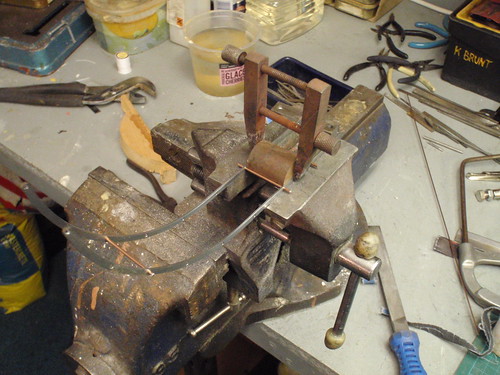
Made up the ladders the other day.
Turned a piece of scrap to length 1.075inches which would act as a spacer.
Clamped the sides to the spacer and set a run either side. Squared one run against the spacer and then set the assembly in the vice such that the sides were level. Applied silver solder. The technic I used was to apply the solder to the tip of the run and then use the heat to draw the solder towards the hole. Naturally a bit of extra heat is required as the vice and spacer will soaks some of it up. Ever wondered why my little vice always looked scorched !

Image

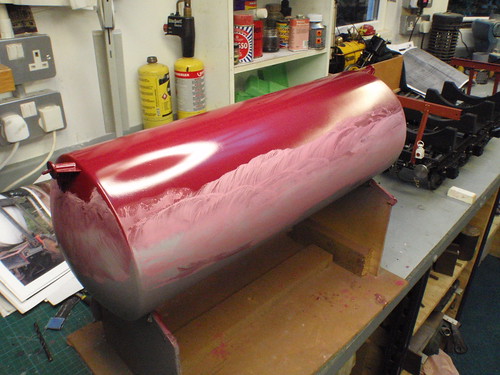
This is the underside of the tank painted and being prepared for the remainder of the painting. This has been done once the paint has had a chance to thoroughly dry. It will be tuned the right way up and then painted all over.

Image
Keith1500
Fat Controller
Posts: 150
Joined: Tue Jul 04, 2006 8:27 pm
Location: B/Hill, Essex

Re: LMS Milk Tank - 2

Post by Keith1500 » Thu Dec 30, 2010 1:01 pm

Managed to find dry day that wasnt too cold and gave the tank its second coat of paint. That had a good few days over Christmas to go hard. Now i am making progress fitting the wooden blocks to the crossbars.

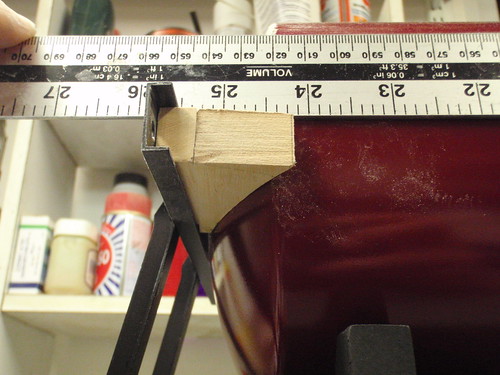
Tricky little job to get the block nicely curved to the profile of the tank and fitting snuggly in the crossbar.
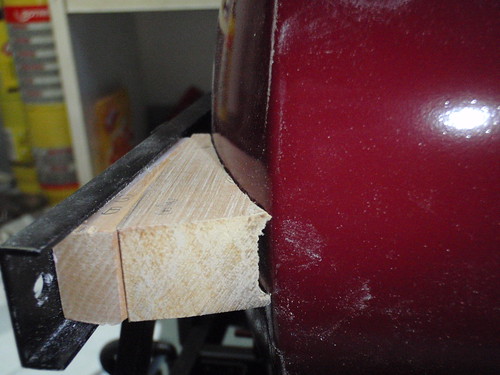
My approach was to make the block in two pieces, one being a wedge, so as material is removed to suit the profile of the tank so the wedge can be inserted a little further. Once the block is snug against the tank the wedge can have material removed until it fits nicley in place. Then the block just need to be trimmed at their ends to get them looking right.

Image

To make things easier when profiling the block to the tank I removed the middle of the block. that way you are only having to fit the top and bottom edges.

Here is a block cut away to show the principle.

Image

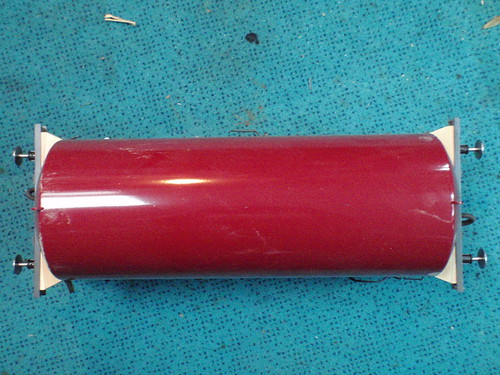
four blocks sitting in place. I am going to use self amalgamating tape between the tank and the block to act as the 1/2inch leather strip. The tape is rubber and nonsticky. Not sure what glue to use as nothing seems to "grab" it.

Image
Keith1500
Fat Controller
Posts: 150
Joined: Tue Jul 04, 2006 8:27 pm
Location: B/Hill, Essex

Re: LMS Milk Tank - 2

Post by Keith1500 » Sat Jan 01, 2011 7:53 pm

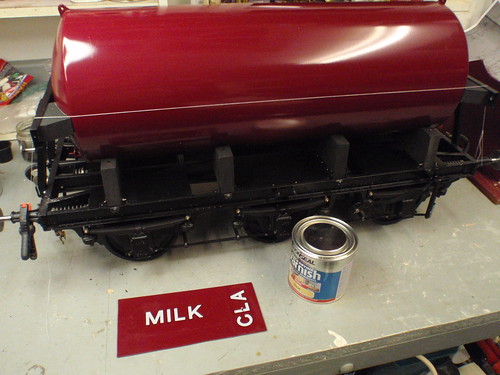
The next bit of work involves applying the transfers to the tank. So i am just in the throws of mentally preparing myself for it! To say I hate this bit is because one false move here and the appearance of the model is ruined. Though on my other wagons I have applied Daves transfers with sucess I have never gone that one step further and finished it off with a coat of lacquer. I have just left the transfer protected by water based varnish used when applying them to the model. As the tank on this model is gloss burgandy red this will stick out like a sore thumb. So the whole tank will be lacquered and effectively "hide" the transfers and varnish etc.

Image

This is a practice piece which I have really tried my luck on - hence the broken transfer. It good to know how far you can go before disaster strikes!. The applied varnish is really noticable. I am hoping with a bit of careful prep work and a coat of Halford's clear lacquer all will come right. I'll let the varnish dry over nigth and try it tomorrow. with the tank I'll leave the varnish a good few days to dry just in case.

Image
Richard Phillips
Fat Controller
Posts: 178
Joined: Mon Feb 23, 2009 6:14 pm

Re: LMS Milk Tank - 2

Post by Richard Phillips » Tue Jan 04, 2011 11:12 am

I had the same problem and brushed water-based varnish over the transfers ant it really shows up to the critical eye (brushing ridges in the varnish undercoat). I missed some bits too which meant the top-coat varnish (in my defense it is see-through) ate through the transfer in places (and note if touching in the letters, they are grey with backing bleed through and not white!). I left it in the end as "wear and tear" - so my wagon has been in service for a while.... ;-) I wonder whether you could spray the water-based varnish...?
Keith1500
Fat Controller
Posts: 150
Joined: Tue Jul 04, 2006 8:27 pm
Location: B/Hill, Essex

Re: LMS Milk Tank - 2

Post by Keith1500 » Tue Jan 04, 2011 10:45 pm

Richard,

Yes indeed there is a waterbased varnish avialable just Google this
Vallejo - Acrylic gloss Varnish Aerosol 400ml. not cheap but it is 400ml. I found a write up on garden railway club website - Google - Converting an LGB van into an ÖBB Dienstwagen where it was used in a very simular application over waterslide transfers. I might splash out and give it a try.

Mean time....

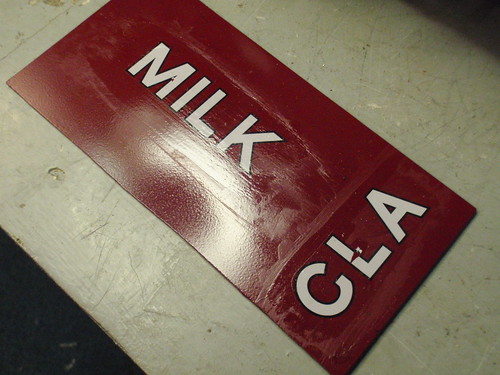
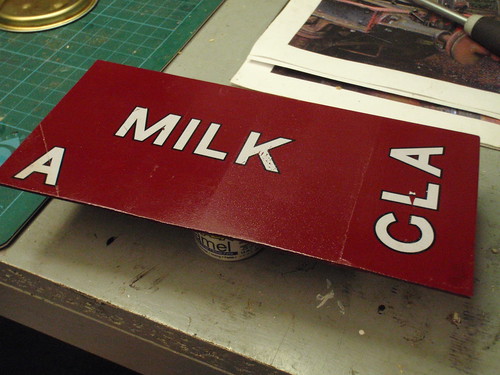
I have been playing with the test piece. Having read Martin's article in Turnout No 50 I tried his method. Which uses the waterbased varnish to apply and seal the transfer then when its dry apply Plastikote polyurethane varnish. Typical of Plastikote it lays downa thick coat. I recon on my test piece it was 10thou. But in doing so it hides all the brush strokes etc. Needs a long time to cure. Not sure I like the polyurethane tint but it does work. This has been applied in the corner, diagonally over the A, on the test piece.
Image

I managed to spray the waterbased varnish over the M and that worked ok. But it is runny as water was used to thin it and therefore there is a huge risk it would run if over done.
The CLA was in a bad way suffering from brush strokes etc. This has been left to dry and then just had 3 coats of Halford's lacquer applied flatting each coat. It also looks quite good considering. So I conclude the secret is in getting the varnish or lacquer layer thick engough to cover whats underneath.

So I am testing out on the letter L the following. Apply transfer using waterbase varnish. let dry one hour and apply second coat brush strokes applied across this time. let dry for say one day. Flatten with 1500 wet paper so it looks like this...
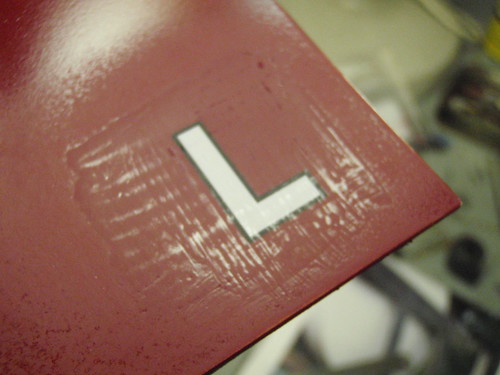
Image

then apply a third coat. let dry say two days. flatten again and let dry. Then apply lacquer or may be the Vallejo Acrylic gloss Varnish. If result is not quite right flatten varnish or lacquer and recoat til its perfect. Hopefully I'll only have to do one coat. We'll see.

Keith
Keith1500
Fat Controller
Posts: 150
Joined: Tue Jul 04, 2006 8:27 pm
Location: B/Hill, Essex

Re: LMS Milk Tank - 2

Post by Keith1500 » Thu Jan 06, 2011 10:09 pm

Well, I am still not sure about which varnish to use. I have ordered the Vallejo - Acrylic gloss Varnish Aerosol and will test that out. I know one thing the Halford lacquer reacts to moisture. Unless the waterbase varnish is thouroughly dry it will craze. Sadly thats the one prefer as opposed to the Plastikote varnish.

Mean time...

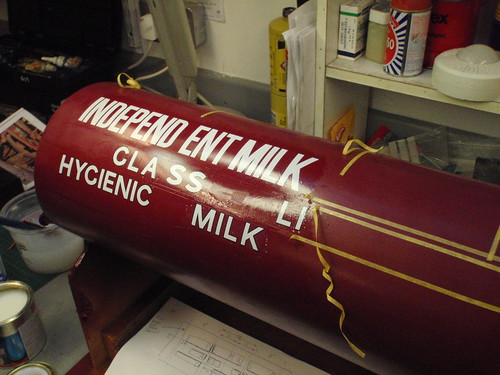
I mapped out the lettering. I use two lines as the aligment datums. The lettering would sit on the line in the case of the INDEPEND ENT MILK SUPPLIES and the other lettering used the a line at the top. Each letter group was then lined up to its right or left of a tank strap. I think I have enough photos to do a Turnout Article if anyone is interested. ???

Image

Here I have used 3mm wide masking tape to mark out the datum lines. As the waterbased varnish dries quite quickly I have removed the tape once the transfer is in position. I found this tape left a line where it had been in contact with the varnish. This was removed using a cotton wool bud.
Dave Harris
Engine Driver
Posts: 33
Joined: Mon Sep 26, 2005 11:27 pm
Location: Frome

Re: LMS Milk Tank - 2

Post by Dave Harris » Fri Jan 07, 2011 8:06 pm

Keith,
Nice pics of your work so far. Silly question, of course we would like to see an article on the tank build....please!

Dave
Keith1500
Fat Controller
Posts: 150
Joined: Tue Jul 04, 2006 8:27 pm
Location: B/Hill, Essex

Re: LMS Milk Tank - 2

Post by Keith1500 » Fri Jan 07, 2011 11:02 pm

Very good of you to say so :D Dave,

I know our Turnout editor is looking for articles at the moment (hint to other members!). I have promised him one which will be on the smoke unit for the Toad brake van which the Colchester boys have been on at me to do for sometime now.

I'll do an article on this transfer lark as I dont think there is enough information avaliable on peoples methods and experiences so mine will be another one to go on. The article is likely to follow the same format as my one on the sandboxes - that is serveral photos complete with an explaination rather than lots of writing.

Watch this space as they say!

Keith
Keith1500
Fat Controller
Posts: 150
Joined: Tue Jul 04, 2006 8:27 pm
Location: B/Hill, Essex

Re: LMS Milk Tank - 2

Post by Keith1500 » Thu Jan 13, 2011 10:29 pm

Progress with the tank is slow because of allowing sufficient time for each of the processes to dry. The waterbased varnish has been allowed to dry before trying to flatten it with 1500 wet n dry and then having done so allowing it a day or two to dry before applying the next coat.

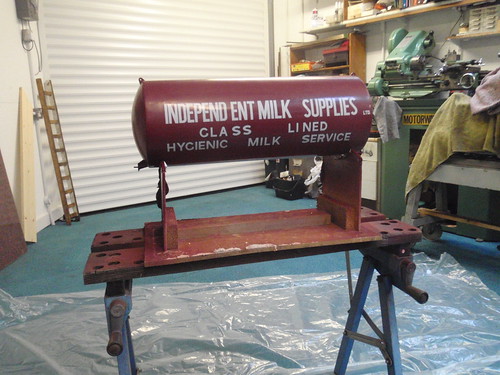
Anyway, after applying three coats of brush on waterbase varnish and rubbing down between coat etc I decided it was time to progress and try out the spray varnish.

Image

The tank has been preped and is ready to recieve its first coat of spray on varnish. The plan was to coat the transfer area only with a view to having to do further flattening. However, in the varnish, it could be seen where the masking tape had been used in marking out the tank holding down straps. So, i decided to give the top of the tank a light coat so as to "seal" it. The idea being, once the varnish had set it could be flatted and hopefully the marks will disapear under the next coat. We shall see. Apparently it is a good idea to use meths to clean over the area where masking tape has been. Live and learn.
Keith1500
Fat Controller
Posts: 150
Joined: Tue Jul 04, 2006 8:27 pm
Location: B/Hill, Essex

Re: LMS Milk Tank - 2

Post by Keith1500 » Tue Jan 18, 2011 10:18 pm

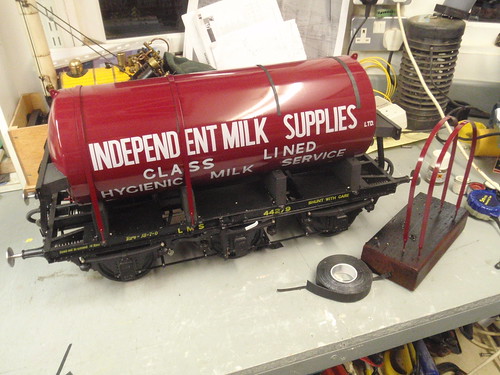
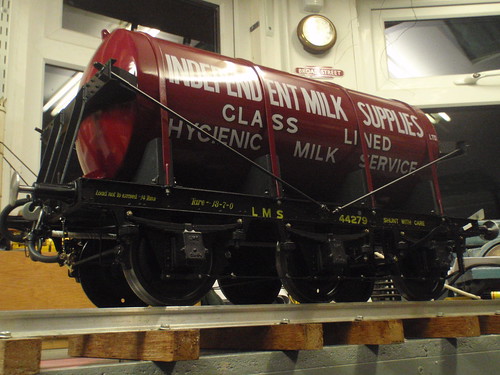
Slung the car out of the garage Saturday morning and hoovered out the place to minimise dust. Done the final prep on the tank and applied two coats of the Vallejo - Acrylic gloss Varnish which went on well. It was left undisturbed for an hour to dry and then moved, still on its cradle, to the work bench where it stayed for another three days without being touched. It now sits upon the frame.

Image

As mentioned before I have used self-amalgamating tape which is a non sticky rubber tape between the saddles and the tank. This takes the place of the 1/2inch leather packing used on the real thing but works and works well, giving the tank something to sit on.

So, It made sense to try the tape out under the holding down straps. To stick it I tried Unibond Extreme Power Repair Glue which it seems was enough to hold the tape to the strap. The stiction between the tape and the tank made manoeuvring the straps over the tank difficult so I applied a dusting of chalk the tape. The straps have gone on nicely. I have added the diagonal stays too and I am very pleased with the tank.

Image

Next is to added the tank fittings and ladders
Keith1500
Fat Controller
Posts: 150
Joined: Tue Jul 04, 2006 8:27 pm
Location: B/Hill, Essex

Re: LMS Milk Tank - 2

Post by Keith1500 » Sun Jan 23, 2011 7:55 pm

Approaching the end of the build.

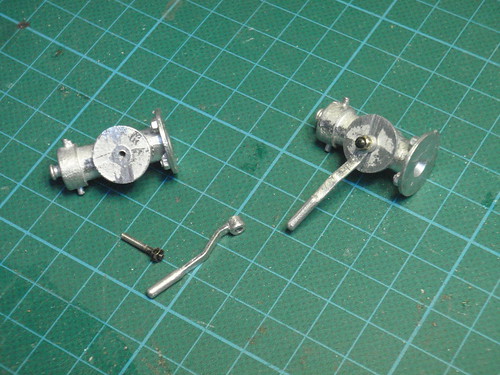
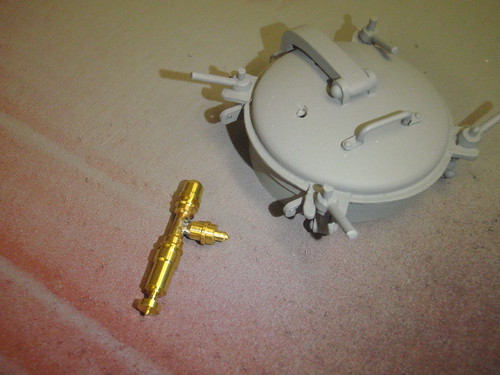
Adding the finishing touches to the model. Started with the discharge valves. Dave had indicated to me the handles on the discharge valves where in the open position and should be turned through 90 degrees. However, if like me you add these after the tank has been mounted there is not enough room for them to rotate on to the 6BA thread if the handle is in the closed position.

Here is my modification to the castings.

Image

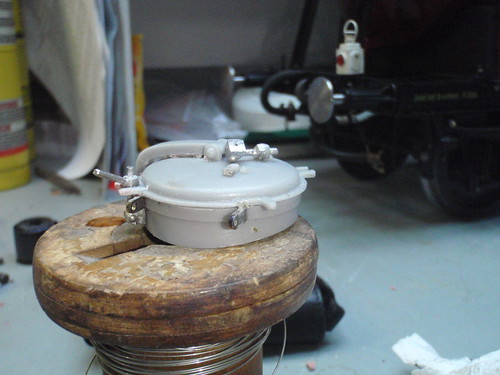
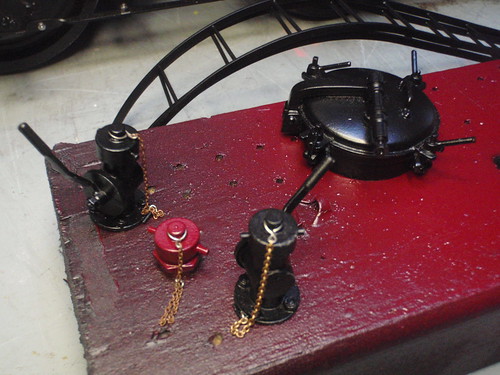
The access lid is an interesting thing. I managed to break off a couple of tabs when the thing slid off the tank on to the bench. So its really easily done ! The little white metal casting for the hatch bolts are glued on the side. I choose to help them stay put with the addition of a 0.6mm piece of wire acting like a dowl. I also used a dowl for the broken tab. Gluing the hatch bolts in place helps strengthen and protect these little tabs. I recommend doing this sooner rather than later to ensure their survival!

Image

According to some drawings I have been referring to, there is a valve on the lid of this version. The main part of the valve was included in the kit of bits but not the mounting. This is a simple turning job an has been soldered on the valve ready for mounting on the lid. This goes in the 2mm hole.

Image
Alan Wood
Fat Controller
Posts: 80
Joined: Wed Sep 28, 2005 1:36 pm

Re: LMS Milk Tank - 2

Post by Alan Wood » Sun Jan 23, 2011 10:38 pm

You sure are a glutten for punishment but it is looking very good and will be nice to see it in a train soon.
Keith1500
Fat Controller
Posts: 150
Joined: Tue Jul 04, 2006 8:27 pm
Location: B/Hill, Essex

Re: LMS Milk Tank - 2

Post by Keith1500 » Mon Jan 24, 2011 11:36 am

Perhaps!

The thing about having a kit is it should take a lot of the chores out of building. Therefore leaving plenty of energy to be diverted in to getting things looking right, which this kit pretty well does.

Fortunately Richard kindly sent me some photos of the works drawing which helped enormously plus Dave Harris send a load of pictures. So armed with all this building information making kit has been great fun. I am not one for reading reams of instructions – give me a photo/diagram/drawing and a few words any day.

What I couldn’t do, is go measure, draw and build a wagon from scratch that would be a gluten for punishment!

I look forward to a pair of these coupled together including the AVB hoses. Should make a good photo.

Here are the finish detail parts ready for fitting.

Image
Richard Phillips
Fat Controller
Posts: 178
Joined: Mon Feb 23, 2009 6:14 pm

Re: LMS Milk Tank - 2

Post by Richard Phillips » Mon Jan 24, 2011 4:50 pm

Ahh, err, Keith, the safety valve on our Lot is different from that of the photos of the drawing I sent...

To make up for it, I have a spare builders plate if you're from the same Lot, as I had two from Bill Hall but it looks like they were only fixed on one side.
Keith1500
Fat Controller
Posts: 150
Joined: Tue Jul 04, 2006 8:27 pm
Location: B/Hill, Essex

Re: LMS Milk Tank - 2

Post by Keith1500 » Mon Jan 24, 2011 5:57 pm

I did wonder. There is a dimensioned sketch on the drawing which I assume was done by you or Dave N as it is in millimeters. It shows the valve on the lid which i must admit i thought was silly place for it !!

Where should it go dare I ask?

Yes to the offer of the builder plate.

I might have a go at making some screw couplings. let me know if you still need a pair in which case if th eidea works I'll swap you for the builders plate.

Keith
Richard Phillips
Fat Controller
Posts: 178
Joined: Mon Feb 23, 2009 6:14 pm

Re: LMS Milk Tank - 2

Post by Richard Phillips » Fri Jan 28, 2011 12:50 pm

Keith1500 wrote:I did wonder. There is a dimensioned sketch on the drawing which I assume was done by you or Dave N as it is in millimeters. It shows the valve on the lid which i must admit i thought was silly place for it !!

Where should it go dare I ask?

Yes to the offer of the builder plate.

I might have a go at making some screw couplings. let me know if you still need a pair in which case if th eidea works I'll swap you for the builders plate.

Keith
The safety valve is, I believe correct for the MMB tank, but not for the IMS lot. They have a vertical safety valve you can see on the photographs, a bit like Geoff Bird's (see back issues of turnout - have copies, although I haven't checked it's the same pattern) - I never got around to making mine - or completing the safety chains - I was in a bit of race against time when I did mine as I was moving house. Reminds me of how much work there is in this model!

email me your address and I'll send the builders plate, although based on the market rate for screw couplings I think I'd owe you a bit of money!
Keith1500
Fat Controller
Posts: 150
Joined: Tue Jul 04, 2006 8:27 pm
Location: B/Hill, Essex

Re: LMS Milk Tank - 2

Post by Keith1500 » Sat Jan 29, 2011 10:39 pm

Yes see what you mean about the valve. I should have cross referenced the pictures. Never mind a pair of piers soon pulled the thing off the lid ! good job I hadn’t fixed the lid in place yet. Still at least anyone doing a MMB version may be inspired - perhaps.

I wouldn’t be asking anything for them. I appreciate the help you have provided. My way of saying thanks. Besides I have spent so long doing paint work etc that I my metalwork skills are a little rusty. I might have made nasty little shackles instead of screw couplings!

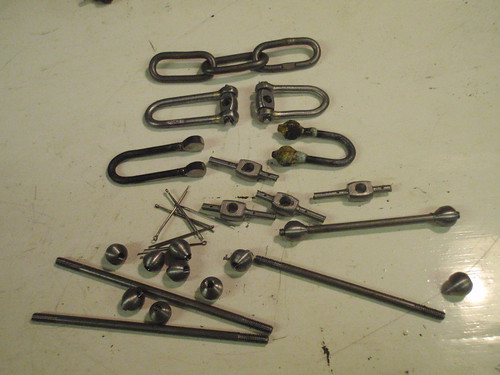
I say one thing, these are not easy components to make. There is a lot of different machining processes in order to try and get the look right. And if I am honest they're not as good as the commercial ones. Close but not as good. Makes you realise they may be fair bit of money but they are worth it.

Anyway, here my version todate.

Image

They are based on my loco coupling but with a short link instead of two long ones and left and right hand thread for the screw adjuster. The general length will be the same as a standard three link to GL5 standards. I note there is not a GL5 drawing for a standard screw coupling - yet ?

The parts are. metal onions 5BA screwed on to 3mm rod and silver soldered. Bend in to a U. The onions have flats machined on them before holes are added. The cross links are turned, then have flats put on them and a tapping hole for 2BA. then back to the lathe for a 7.5deg tapper and then a 15 tapper followed by rough emery cloth and it looks sort of curved. then two 0.9mm holes for split pins. That’s it todate.
Keith1500
Fat Controller
Posts: 150
Joined: Tue Jul 04, 2006 8:27 pm
Location: B/Hill, Essex

Re: LMS Milk Tank - 2

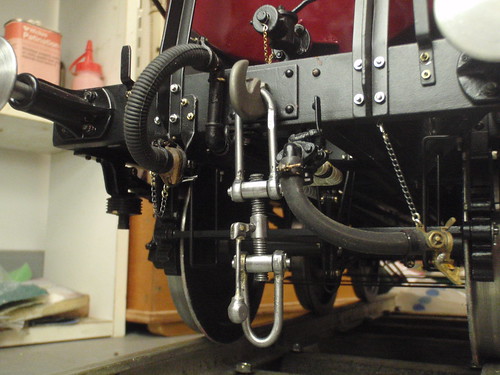
Post by Keith1500 » Tue Feb 01, 2011 10:30 pm

Finally got to finish one coupling and fit it on to the wagon. fairly pleased with it. Just need a little bit more cleaning up and then bluing in some old oil.

Image

just hope it stands up to the rigors of shunting and 0 to 60 drivers!
Keith1500
Fat Controller
Posts: 150
Joined: Tue Jul 04, 2006 8:27 pm
Location: B/Hill, Essex

Re: LMS Milk Tank - 2

Post by Keith1500 » Sun Feb 06, 2011 10:17 pm

Finally got some time in to complete the milk tank build.

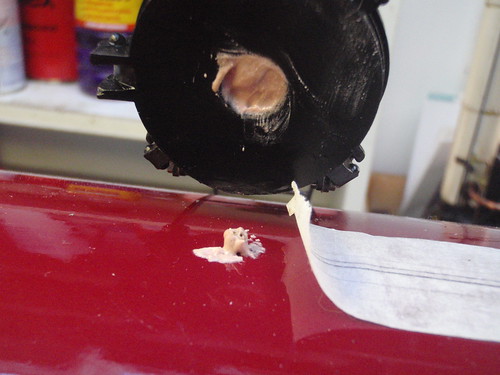
Corrected the valve by removing it and repairing the access lid with some filler and respraying it. Turned up a new valve and fitted it in place. Attached the steps to the lid (both sides) and fixed the lid in place with a bit of P38.
Then finally went over the wagon trimming any long bolts and painting in the nuts etc having first applied a drop of nutlock.

Image


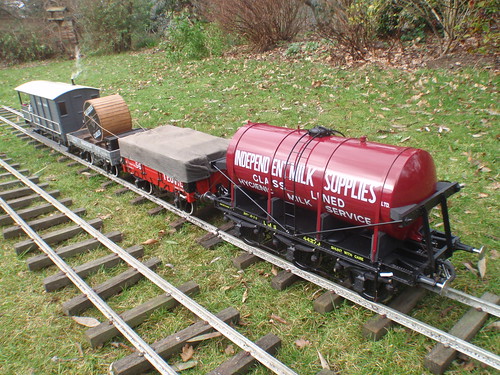
Therefore the wagon was out-shopped and has now joined the others
(here on display in the order of build)

Image

Big Thanks go to Dave for the kit plus advice support during the build.
To Richard for his advice, knowledge and photos.


So... whos going to do the next thread - Milk Tank 3 ??

cheers
Keith
Dave Harris
Engine Driver
Posts: 33
Joined: Mon Sep 26, 2005 11:27 pm
Location: Frome

Re: LMS Milk Tank - 2

Post by Dave Harris » Sun Feb 06, 2011 10:32 pm

Keith, Excellent job on the milk wagon! Thanks for the build story and the pics, keep up the good work! Dave H
Post Reply